How to Monitor PostgreSQL Performance in AWS RDS
In previous tutorials, we’ve seen how to monitor PostgreSQL performance with Datasential running locally.
These tutorials included FastAPI integration , utilizing ChatGPT API to propose solutions to PostgreSQL performance issues, and analyzing PostgreSQL performance reports with Python and Bash.
Today, we will integrate Datasentinel with a cloud-managed database service in AWS, Amazon RDS. This service is a fully managed relational database that makes it easy for you to manage and scale your relational database.
You’ll spin up an Amazon RDS instance and connect it to an Amazon EC2 instance and then install the Datasentinel agent to connect the RDS instance to your Datasentinel platform server. Thus, you will be able to monitor the databases that exist on your RDS instance.
This tutorial assumes you already have an AWS account with permission to create EC2 and RDS instances.
Launching Amazon EC2 instance
To communicate with the Datasentinel agent, you need to have a server. One of the options to have a server is to launch an Amazon EC2 instance through the AWS console.
Make sure to choose an Amazon region from the top right corner before launching the EC2 instance.
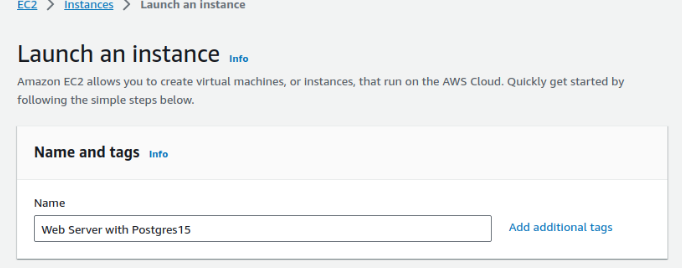
You can go ahead and hit the Launch instance button on the EC2 instance AWS console page. We’ve named this server Web Server for PostgreSQL 15, but feel free to name it whatever you want:
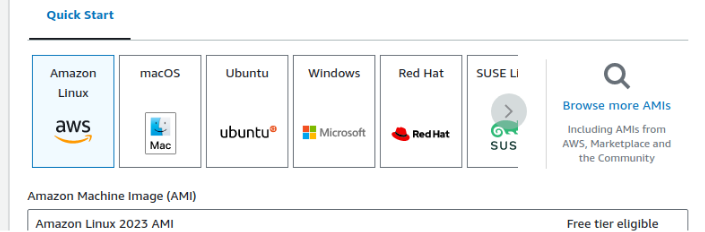
You can also pick your desired server but in this tutorial, we will explain how to set up everything on an Amazon Linux 2023 machine:
One of the important network configurations is that you can allow only your IP address to be able to ssh into this Amazon EC2 instance. So make sure to set your IP address. Or you can allow all traffic, but this is not recommended in terms of security.
Creating an Amazon RDS instance
Before creating the RDS instance, you need to make sure you’re in the same region as the EC2 instance you created in the previous section. This is important to establish a direct network connection.
Let’s spin up the RDS instance the easy way:
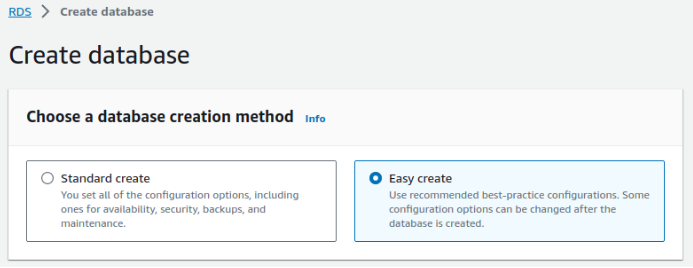
This Easy create option gives you the basic setup that you need for the database configuration. It’s a good start if you don’t want instance customizations. If you need to customize any configuration, you can modify the RDS instance to whatever you want after choosing the Standard create option.
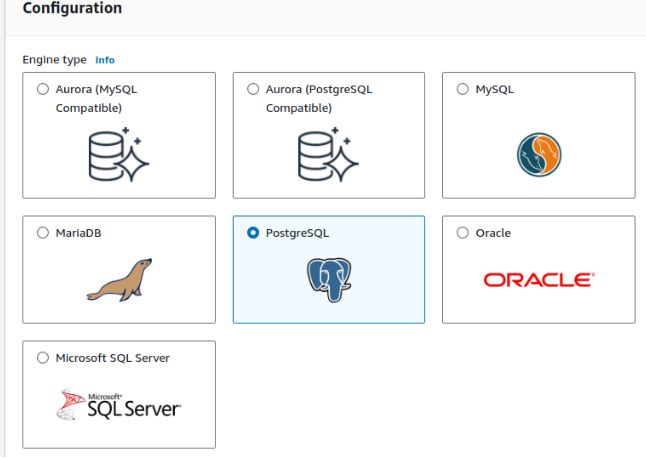
Since we want this relational database to be PostgreSQL, let’s pick PostgreSQL from the database engine configuration section:
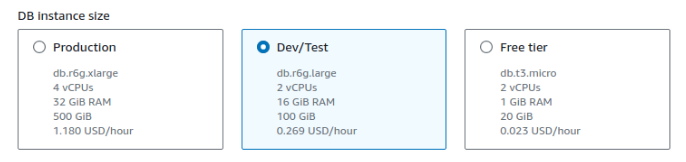
You also have control over the database instance size, you can start with the free tier. We’ve just picked Dev/Test size configs:
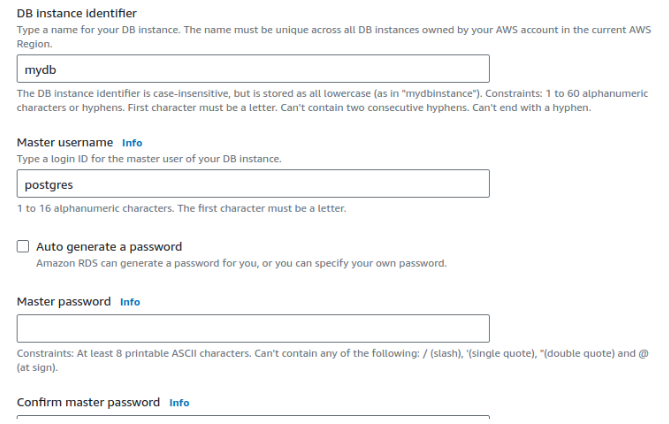
Next, you need to name this RDS instance. We’ve named it mydb, but feel free to name it based on your preference. Also, make sure to create the master username and password for this instance because you’ll need it when you connect to the psql client:
Connecting RDS instance to EC2 instance
Before finalizing the creation of the RDS instance, you have an option to connect it to an EC2 instance. You can select the ‘Connect to an EC2 compute resource’ option and pick your EC2 instance from the drop-down:
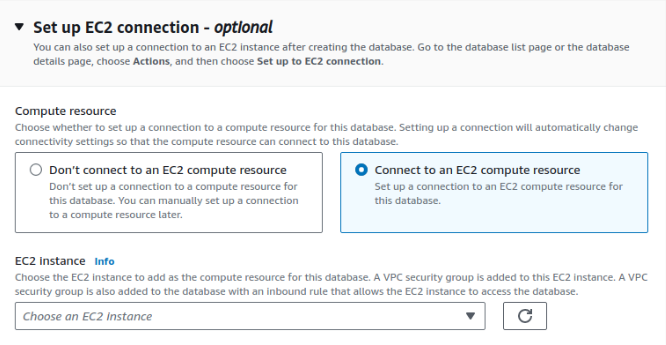
In our case, we would pick the Web Server for PostgreSQL 15 instance.
There are network configurations done for us under the hood, such as creating the security group that is added to the RDS instance to receive inbound traffic from the EC2 instance.
Installing PostgreSQL 15 on the EC2 instance
Since the default user name for an Amazon Linux 2023 machine is ec2-user, you can ssh into the EC2 instance on the terminal of your local machine using the following command:
ssh -i {your-pem-file}.pem ec2-user@{your-ec2-public-ip-address}You need to have your .pem file to authenticate so that you can connect to the EC2 instance. You’ll also need to have the public IP address that you can find in the EC2 configurations when you click on the instance’s name on the AWS console.
If that ssh command runs successfully, you’ll get inside the EC2 instance and you can start installing PostgreSQL version 15:
sudo dnf install postgresql15 postgresql15-server postgresql15-contrib.x86_64You’ve installed postgresql15 client and its server. You’ve also installed postgresql15-contrib.x86_64 package to get the pgbench command-line utility that you’ll use for benchmarking.
Next, you’re going to download the Datasentinel agent on your EC2 instance.
Installing Datasentinel agent on EC2 instance
Since Amazon Linux is built on CentOS 9, we would install the Datasentinel agent version RedHat/Centos/AlmaLinux 9.
Open up the terminal on your EC2 machine and head over to the root directory with cd / and then download the agent with wget:
wget https://app.datasentinel.io/ds-api/download/datasentinel-agent-rhel9-latest.tar.gzNow, you have the archive file of the agent on the root directory, let’s un-compress it with tar:
tar xvzf datasentinel-agent-rhel9-latest.tar.gzYou’ll need to start the agent with the datasentinel agent command so let’s configure that through the environment variables:
export DATASENTINEL_PATH="`pwd`/datasentinel"
export LD_LIBRARY_PATH=$DATASENTINEL_PATH/lib
export PATH=$DATASENTINEL_PATH:$PATH
Consult the user guide for instructions on installing the Agent .
Starting the Datasentinel agent
Now, you can start the agent with the following command:
datasentinel start agentTo check the status of the running agent, run the following:
datasentinel status agent # server to be definedSetting the Datasentinel platform server
If this is your first time running the start sub-command, part of your response will look like the following:
    Upload
            host : upload_server_to_be_defined
            port : 443
The host value should be your Datasentinel platform server. This server should be in your inbox when you received the welcome email from Datasentinel. Let’s define it as an environment variable:
export DATASENTINEL_PLATFORM_SERVER=<your-datasentinel-platform-server>Then, you can set that server taking into consideration that the default port for that server is 443:
datasentinel set server $DATASENTINEL_PLATFORM_SERVERYou can check the server status by the previous status sub-command or you can get it with CURL by calling the $BASE_URL/api/server/ endpoint:
BASE_URL=https://localhost:8282
curl -k -X GET $BASE_URL/api/server
If it runs successfully, you should get the same Datasentinel platform server that you set running on port 443.
Generating the Datasentinel token
To communicate with the Datasentinel platform, you need to set the token that you received in your email:
export DATASENTINEL_TOKEN=<your-datasentinel-token>
datasentinel set token $DATASENTINEL_TOKEN
Then check if it’s generated successfully:
datasentinel show tokenConfiguring the RDS instance
When we configured the RDS instance in the AWS console, we manually set up the master username and password. Now, we need to connect to the RDS instance through the psql command-line utility inside the EC2 machine:
psql -h mydb.<hash>.<region>.rds.amazonaws.com -p 5432 -d postgres -U <username>The -h option value is the RDS endpoint. You can get it from the RDS instance when you click on the mydb instance that you created. The -p option value is the PostgreSQL port and postgres is the default database name inside that instance. The -U option value is the master username.
Once you hit enter, you’ll get a prompt asking you to enter your master password.
Now, you’re ready to create a database inside that RDS instance. We can then populate a few benchmarks to test monitoring PostgreSQL performance in the Datasentinel platform. Let’s create it with the following PostgreSQL command:
postgres=> CREATE DATABASE plans;Benchmarking PostgreSQL queries using pgbench
To test connecting RDS with Datasentinel, we need to simulate some workload in the plans database we created. If you already have a workload in the connected database, you can skip this section.
We will use the pgbench tool which is a simple program to run benchmark tests on a PostgreSQL database. By default, it involves five SELECT, UPDATE, and INSERT commands per transaction.
Let’s initiate pgbench with the -i option and then the database that we’ve created: (feel free to place a database other than plans). Head over to your EC2 instance and then enter the following:
pgbench -i -h mydb.<hash>.<region>.rds.amazonaws.com -p 5432 -d plans -U <your-username>Now, invoking the pgbench initialization begins:
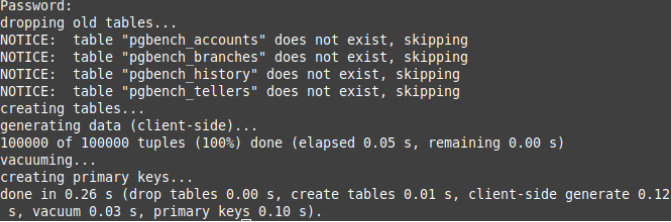
To run the pgbench program, you can use the pgbench command:
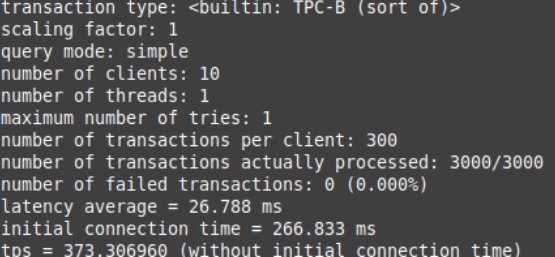
pgbench -h mydb.<hash>.<region>.rds.amazonaws.com -p 5432 -d plans -U <your-username> -c10 -t300In this example, we’ve used the -c option with 10 to indicate that we need 10 clients to simulate running the queries which indicates the number of database sessions. Additionally, specifying the -t option with 300 value indicates that there are 300 transactions run by each client.
When you apply this pgbench command, you’ll see statistics like the following:
Adding a Datasentinel connection to the RDS instance’s PostgreSQL
Before adding a Datasentinel connection, you need to make sure the pg_stat_statements PostgreSQL extension is created on your RDS instance. So let’s enter the RDS instance again with the psql client and create that extension:
CREATE EXTENSION pg_stat_statements;You can check if the extension is created by running the following:
SELECT * FROM pg_stat_statements;You’ll also need to create a database username and password with specific privileges. This should allow Datasentinel to monitor tasks on that RDS instance.
Since we’re using PostgreSQL version 15, we can create the username and password with the following commands:
CREATE USER <your-db-username> PASSWORD '<your-db-pwd>';
GRANT pg_monitor,pg_read_all_settings,pg_read_all_stats TO <your-db-username>;
This creates a new user with a password and grants the required privileges to that user.
In Amazon Linux 2023, you’ll see that the pg_hba.conf location is in /var/lib/pgsql. So go ahead and cd into that directory with sudo and use your preferred text editor (e.g. vim) to add the following:
# TYPE  DATABASE        USER            ADDRESS                 METHOD
host    all         <your-db-username>    mydb.<hash>.<region>.rds.amazonaws.com             md5
The line shown above specifies an entry in the file that grants access to the database username that you created. The user is allowed to connect to the RDS instance endpoint (mydb.
Adding all keyword to the DATABASE column gives this user access to all your databases.
Now, you’re ready to add a connection to the PostgreSQL database in the RDS instance:
CONNECTION_NAME=mydb_conn
curl -k --header "api-token: $DATASENTINEL_TOKEN" \
        --header 'Content-Type: application/json' \
        --request POST "$BASE_URL/api/connections/$CONNECTION_NAME" \
        -d @body.json
The body.json file looks like the following:
{
    "host": "mydb.<hash>.<region>.rds.amazonaws.com",
    "port": 5432,
    "user": "<your-database-username>",
    "password": "<your-database-password>",
    "tags": "application=test_app,environment=development,provider=amazon,datacenter=london"
}
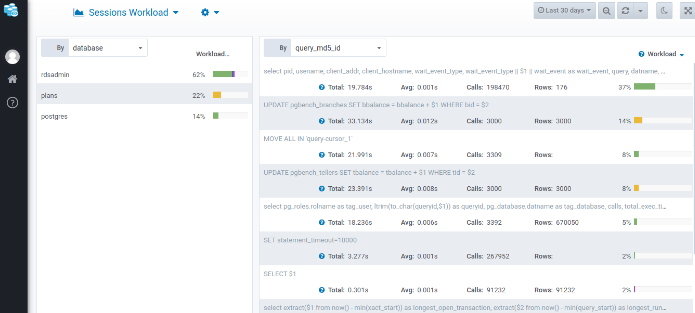
Your Datasentinel platform server is now connected to your RDS instance and you can monitor PostgreSQL performance. You can take a look at the dashboard below:
Want to see why DataSentinel stands out? Explore our Key Features now.
If you don’t need the EC2 and RDS instances, you need to stop and/or terminate them to save your AWS credits.